Chưa phân loại
Cuticle Care Routine for Nail Technicians: Step by Step
Cuticle Care Routine for Nail Technicians: Step by Step
A consistent cuticle care routine for nail technicians helps protect both the client’s skin and the tool used for trimming. Inconsistent results often come from skipping important steps rather than a lack of technical skill.
A professional routine should be simple, repeatable, and adapted to the condition of each client’s cuticles. From softening and pushing back the tissue to selecting the correct nipper jaw size and maintaining the tool afterward, each step contributes to a cleaner and more controlled service.
This guide walks through a complete cuticle care routine for nail technicians, from preparation to aftercare, with practical guidance on choosing and maintaining the right tools.
Step 1: Soften the Cuticles Before You Cut
Cuticle tissue that has not been properly softened can resist a clean cut regardless of how sharp the nipper is. Trying to cut dry, resistant tissue is one of the most common reasons for accidental nicks and uneven results.
A few minutes of a warm water soak or the use of a dedicated cuticle softening product can help relax the tissue. This allows the nipper to cut through the softened tissue more smoothly rather than pulling or tearing it.
Skipping this step to save a few seconds can make the rest of the service more difficult. Proper softening should therefore be the first step in a professional cuticle care routine for nail technicians.
Step 2: Push Back the Cuticles Before Trimming
After softening the tissue, gently push the cuticles back with an appropriate pusher tool before reaching for the nipper.
This separates dead or loose tissue that may need to be removed from healthy skin that should remain attached to the nail.
Pushing first also makes it easier to see how much tissue actually needs trimming. This directly affects your choice of jaw size.
For example, after pushing back the cuticle, a technician may discover that only a small amount of excess tissue is present. In that situation, a quarter-jaw or half-jaw nipper may be sufficient.
Skipping this step can lead to unnecessary trimming because the technician cannot clearly see the actual amount of tissue that needs to be removed.
Step 3: Choose the Right Nipper Jaw Size
Once the dead or excess tissue is visible, choose the nipper according to the amount of trimming required.
A useful approach is:
- Quarter jaw: Suitable for minimal trimming and clients receiving their first professional service.
- Half jaw: Appropriate for most routine maintenance appointments.
- Full jaw: Best reserved for situations where there is noticeably more tissue to remove, such as a client who has not received professional nail care for several months.
Using the same jaw size for every client is not necessarily the best approach. The amount of tissue present should determine the tool.
Choosing the appropriate jaw size makes the cuticle care routine for nail technicians more precise and can help reduce unnecessary trimming.
Step 4: Cut in Small, Controlled Passes
Professional cuticle trimming favors several small and controlled cuts rather than one large cutting motion.
This is particularly important when working with high-carbon steel nippers, which can provide excellent cutting performance when used with controlled technique.
Small cutting passes also make it easier to adjust as you work. If a cut is slightly longer than intended, there is less tissue to correct than there would be after one large cut.
Instead of trying to remove everything in one motion, follow the natural shape of the cuticle and work gradually along the edge.
A controlled approach is one of the most important elements of an effective cuticle care routine for nail technicians.
Step 5: Check for Bleeding Before Continuing
Even with proper technique, a small nick can occasionally occur.
The important part is to identify it immediately rather than continuing the service and noticing the problem later.
If a minor nick occurs, apply gentle pressure with a clean, dry cotton pad for several seconds. In many minor cases, light pressure is sufficient to control the bleeding.
Checking the skin immediately after trimming helps keep a small issue from becoming a larger problem and should be part of every professional cuticle service.
For more information, see our guide on why cuticles bleed and how to prevent it.
Step 6: Finish with Cuticle Oil or Moisturizer
After trimming, apply an appropriate cuticle oil or moisturizer to the treated area.
Freshly trimmed cuticles can be more vulnerable to moisture loss and minor irritation during the first day or two. Applying a suitable moisturizing product helps maintain comfort and supports the condition of the surrounding skin.
This step also gives the technician another opportunity to inspect the finished cut before the client leaves the chair.
Look for uneven edges, remaining loose tissue, redness, or any area that may require additional attention.
Including aftercare in the cuticle care routine for nail technicians helps create a more complete and professional client experience.
Step 7: Clean and Prepare the Tool for the Next Client
The maintenance routine does not end when the client leaves the chair.
After the service, the cuticle nipper should be cleaned and disinfected according to the salon’s established protocol. Once disinfection is complete, the tool should be dried thoroughly before storage.
This drying step is particularly important for high-carbon steel nippers because carbon steel can corrode more quickly than stainless steel when exposed to residual moisture.
Avoid leaving a wet nipper inside a tray or closed container. Thorough drying helps reduce corrosion and keeps the hinge and cutting edge in better condition.
Proper tool maintenance should therefore be considered the final step of a complete cuticle care routine for nail technicians.
For detailed instructions, see our full guide on how to disinfect cuticle nippers between clients.
Common Routine Mistakes That Lead to Poor Results
Even experienced nail technicians can encounter inconsistent results when important steps are rushed or skipped.
Skipping the softening step
Trying to cut dry, resistant tissue can cause the nipper to pull or tear instead of making a clean cut. Proper softening makes trimming easier and more controlled.
Cutting before pushing
Cutting before pushing back the cuticle makes it harder to distinguish dead tissue from healthy attached skin. This can result in removing more tissue than necessary.
Using the same jaw size for every client
Every client has different cuticle conditions. Automatically reaching for a full-jaw nipper can lead to unnecessary trimming when a smaller jaw would be sufficient.
Rushing the drying step
Leaving moisture on the tool after disinfection is particularly problematic for high-carbon steel nippers. Thorough drying should never be treated as an optional final step.
Focusing only on the cutting technique
A professional service involves more than cutting. Preparation, tool selection, skin inspection, aftercare, cleaning, disinfection, and storage all contribute to consistent results.
Frequently Asked Questions
Why do I need to soften cuticles before cutting them?
Unsoftened cuticle tissue can resist a clean cut and increase the risk of pulling or tearing. This can cause discomfort for the client and may also contribute to faster wear on the cutting edge.
Softening the tissue first makes it easier for the nipper to make a controlled cut.
Should I push cuticles back before trimming them?
Yes. Pushing back softened cuticle tissue helps reveal how much dead or loose skin actually needs to be removed.
This makes it easier to select the appropriate jaw size and reduces the risk of removing healthy tissue unnecessarily.
What jaw size should I use for a standard cuticle care routine?
A half-jaw cuticle nipper is suitable for many routine maintenance appointments.
A quarter-jaw nipper can be appropriate when only minimal trimming is required or for certain first-time clients. A full-jaw nipper should generally be reserved for situations where there is significantly more tissue to remove.
The final choice should always be based on the actual condition of the cuticle rather than using the same jaw size for every client.
How do I know if I’m cutting too much cuticle?
If you regularly use a full-jaw nipper regardless of how much tissue is visible after pushing the cuticle back, you may be removing more tissue than necessary.
Client feedback is another useful indicator. Frequent soreness, irritation, or bleeding may suggest that the trimming technique or amount of tissue removed needs to be reassessed.
What should I do immediately after a small nick during a service?
Apply gentle pressure with a clean, dry cotton pad for several seconds.
Most minor nicks can be managed with immediate attention. Do not simply continue the service without checking the affected area first.
If bleeding does not stop or the injury appears more serious, follow your salon’s established safety and first-aid procedures.
How to Build a Consistent Cuticle Care Routine
A reliable cuticle care routine for nail technicians is not about performing exactly the same movements on every client. It is about following the same basic process while adjusting each step according to the client’s actual cuticle condition.
The core process is:
Soften → Push → Assess → Choose the jaw size → Trim carefully → Check → Moisturize → Clean and maintain the tool
This approach allows the technician to make informed decisions instead of automatically using the same tool or technique for every service.
The condition of the cuticle should determine how much trimming is necessary, while the amount of tissue should determine the appropriate jaw size.
Choosing the Right Cuticle Nipper
Tool selection plays an important role in an effective cuticle care routine for nail technicians.
Vina Nippers manufactures cuticle nippers in quarter-jaw, half-jaw, and full-jaw configurations, allowing technicians to select the tool according to the amount of tissue that needs to be removed.
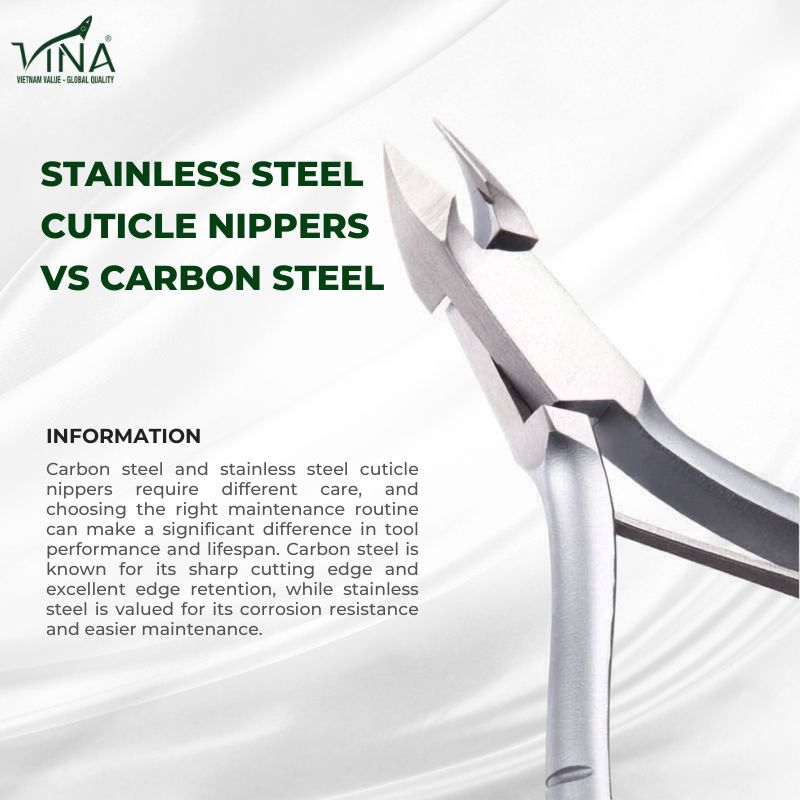
The range is available in both carbon steel and stainless steel, giving salons additional options based on their preferred cutting performance and maintenance routine.
Carbon steel can provide excellent hardness and cutting performance but requires careful drying after disinfection. Stainless steel offers greater resistance to corrosion and can be a practical choice for salons looking for easier maintenance.
The best tool is therefore not necessarily the largest or sharpest one. It is the tool that matches the client’s needs and allows the technician to make controlled, precise cuts.
A professional cuticle care routine for nail technicians starts before the nipper ever touches the client’s skin.
Softening the cuticle, pushing the tissue back, assessing how much needs to be removed, choosing the appropriate jaw size, making small controlled cuts, checking the finished result, and applying aftercare all contribute to a safer and more consistent service.
Tool maintenance is equally important. Cleaning, disinfection, thorough drying, and proper storage help preserve the cutting edge and extend the working life of professional cuticle nippers.
Vina Nippers manufactures cuticle nippers in quarter, half, and full jaw sizes, with both carbon steel and stainless steel options. This allows nail technicians and salons to choose a tool that fits their actual service requirements rather than relying on a single tool for every client.
Browse the full range of Vina Nippers cuticle nippers or request wholesale pricing for your salon.

Most viewed article

Top 5 Best Cuticle Nippers for Nail Technicians

Mastering the Art of Choosing the Best Cuticle Nippers: A Guide

How to Use Cuticle Nippers Properly: A Step-by-Step Guide by Vina Nipper

Toenail Nippers vs. Cuticle Nail Cutter: Choosing the Best Tools for Nail Car